Expert Tips for Measuring and Sizing Nails Perfectly
- May 11
- 6 min read

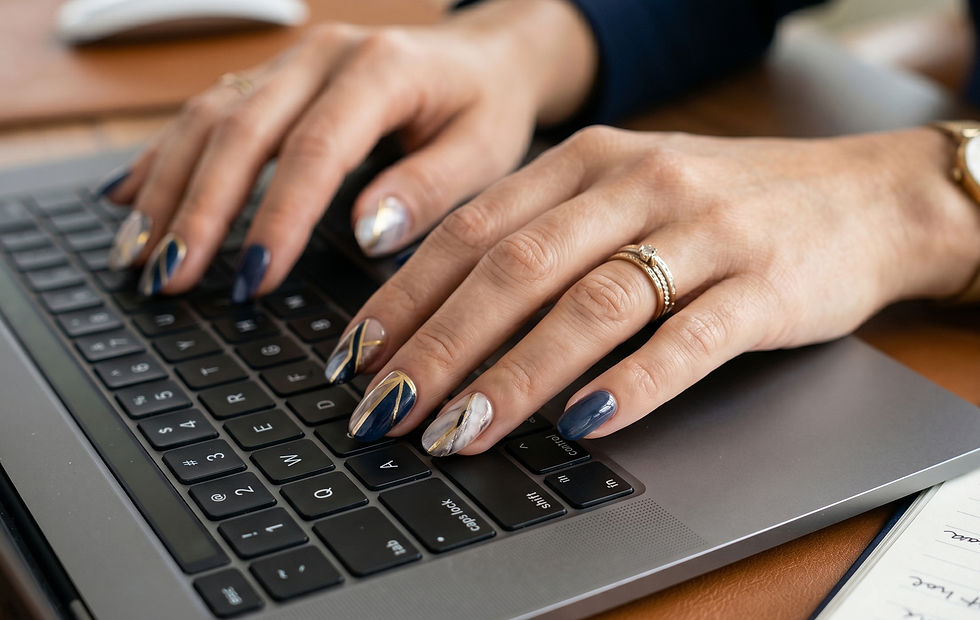
When you want your nails to look polished and professional, color and design are only part of the story. The way your press-ons fit your natural nails can be the difference between a set that feels luxurious and one that pops off mid-gesture.
Perfect sizing supports both comfort and style, giving you nails that look like they were made for you, not just made in a factory. Treating sizing as a key step in your routine means fewer mishaps, less frustration, and a whole lot more confidence.
Every person’s nail beds are different, so “one size fits all” rarely delivers the smooth, tailored look most people want. Taking a little time to measure correctly helps prevent press-ons that pinch, gap, or lift at the corners. Just like slipping into shoes that actually fit, the right nail size lets you move through your day naturally, without that nagging awareness that something feels off.
With a few simple tools and a methodical approach, you can build a custom-size map for your hands that you can reuse every time you order a new set.
Mastering Nail Measurement Techniques
Before you measure a single nail, gather the tools that will help you get reliable results. A flexible measuring tape is ideal, since it can follow the natural curve of your nail bed. If you do not have one, a small ruler can work, but you may need to be extra careful about alignment. Many people also use a nail sizing kit that includes sample tips in a range of sizes; these can be placed directly on your natural nails to see what fits best. A pen and notebook or a note-taking app completes the setup, giving you a permanent record of your measurements for future sets.
Start with the width of each nail, since this is what determines how well a press-on hugs your nail from side to side. Beginning with your dominant hand, place the tape or ruler across the widest point of the nail, usually just above the cuticle where the nail starts to fan out. Make sure the tape lies flat and straight, without tilting or leaving gaps at the edges. Record the width in millimeters for each finger from thumb to pinky. This may feel meticulous, but those small numbers are what keep your press-ons from feeling too loose or too tight.
Once you have the widths, move on to length. Length is a blend of function and style: some people love a short, practical length that works easily with typing or childcare, while others enjoy longer tips for a more bold effect. To measure, place the end of the tape at the cuticle line and extend it to the free edge of your natural nail. Jot down each number, noting which fingers you might prefer slightly shorter or longer based on your daily activities. This helps you choose press-on lengths that look beautiful without getting in your way.
To make your measuring session even more effective, try adding these habits:
Write down the date beside your measurements so you can see changes over time.
Note which fingers tend to be “tricky” for sizing, like thumbs or index fingers.
Keep a quick photo of your notes in your phone for easy reference when ordering.
When you’ve finished, review your measurements for accuracy. If a number looks off compared with the others, quickly remeasure that nail rather than guessing. Consistency is your goal; a few extra seconds now can save you from a full set that doesn’t feel right later. Over time, you will get faster and more confident with the process, and measuring will become a smooth, almost automatic part of your routine.
Perfecting Nail Sizing for Every Occasion
With your measurements in hand, it is time to match them to actual nail sizes. Most press-on brands provide a size chart that translates millimeters or kit numbers into specific tips for each finger. Look up your recorded widths and choose the closest size for each nail. The press-on should cover your natural nail completely from sidewall to sidewall without resting on the skin. If you find yourself between two sizes, it is usually safer to pick the slightly larger size and file the edges than to squeeze into a smaller one.
Length is where your lifestyle really matters. If you spend a lot of time typing, working with your hands, or caring for small children, shorter nails will likely feel more practical. For special events, photoshoots, or nights out, you may feel comfortable going longer and more dramatic. The key is to align your chosen length with what your day actually looks like, not just what seems pretty in a photo. That way, your nails feel like part of your life, not an obstacle.
If you choose to use a sizing kit, treat it like a fitting room. Each sample tip can be placed on your natural nail without glue to test the fit. It should sit snugly without forcing or leaving gaps. Try different sizes on tricky fingers and pay attention to how the sides line up. Take your time with this step; it is much easier to adjust at this stage than after you have ordered a full set.
When you are translating measurements into final sizes, keep these ideas in mind:
Label each size with “L” or “R” for left and right hand if they differ even slightly.
Keep your chosen size numbers in one place so you can reuse them for future sets.
Write down separate notes for “daily length” and “special occasion length” if you like to switch it up.
As you refine your sizing, you will start to notice patterns. Maybe your ring fingers tend to run smaller than the chart suggests, or your thumbs need extra care to get just right. Those small discoveries help you order with confidence, trim less, and spend more time enjoying your nails instead of fixing them. Over time, you create your own personal sizing profile that works across designs, colors, and styles.
Ensuring Comfort and Durability with Custom Fits
Even with perfect measurements, there are a few common missteps that can affect comfort and wear time. One frequent mistake is choosing nails that are visibly narrower than your natural nail because they “look neater.” This often leads to gaps at the sides where water and debris can gather, and it puts more pressure on the center of the nail. On the other hand, nails that are too wide can press into the skin, causing discomfort and lifting at the edges. Trust those measurements you took; they are more accurate than a quick glance.
Lighting plays a bigger role than most people realize. Trying to size or apply nails in dim light can make it hard to see whether the press-ons truly cover the nail bed evenly. Working in a bright, well-lit area helps you check alignment, especially near the cuticles and sidewalls. It also allows you to spot small issues—like a tiny overlap or gap—before the adhesive sets.
Comfort and durability are tightly linked. When your nails fit correctly, adhesive can spread evenly across the underside of the press-on, creating a strong, uniform bond. This reduces air pockets and weak spots that can lead to lifting or early pop-offs. Properly sized nails also distribute everyday pressure—from opening doors to typing on a keyboard—across the entire surface, instead of concentrating it at one painful point.
You can support comfort and long wear by adding a few simple habits to your routine:
Lightly buff the surface of your natural nail before application to help the adhesive grip.
File the press-on edges so they mirror the exact shape of your cuticle line.
Avoid soaking your hands in hot water for several hours right after application.
After removal, gentle care keeps your natural nails in good condition for your next set. Use recommended removal methods rather than prying or peeling, which can strip layers from the nail plate. Hydrate your nails and cuticles with oil or a light cream, and give them a brief break if they feel tender. Healthy natural nails are the best base for any press-on style, and your sizing work will pay off even more when your nails are strong and smooth underneath.
Dazzle With Confidence: Get Your Perfect Nail Fit
Learning how to measure and size your nails transforms press-ons from a one-time experiment into a reliable, go-to beauty ritual. When your nails fit comfortably and look seamless, you can enjoy every gesture—from typing a message to holding a glass—with confidence instead of worrying about lifting corners or loose tips. A few careful measurements, a bit of note-taking, and a little patience give you nails that feel custom-made for your hands.
At Miss P. Dazzle, LLC, we believe that a flawless fit is just as important as a flawless design. Our sizing guidance, kits, and curated nail sets are created to help you match your unique nail shape with styles that suit your life, whether you prefer everyday elegance or full-on statement nails. With the right measurements, your favorite designs sit comfortably and stay put, so all anyone notices is how stunning they look.
Get flawless results every time—Order your nail sizing kit and ensure your press-on nails fit perfectly, look stunning, and feel comfortable for every occasion.
Ultimately, sizing nails isn't just about what meets the eye; it’s an art and science blended into empowering each application with comfort and style.


Comments